


How to Make Your Own "Sheet Yarn"
/
Do you happen to have an extra old sheet or two lying around the house you haven't used in forever? If so, I've got the perfect DIY for you to put those sheets to good use!
So I was at Wal Mart the other day, and I came across these super duper cheap twin sheet sets and thought to myself, "surely there is something I can make with those!" Which is kind of weird, because who sees sheets and thinks they can make something with them? Anyways, I talked myself out of buying them that day, because I couldn't quite think of something I could make with them, and I probably shouldn't just buy random sheets like a crazy person.

Later, I come across this image of a super cute little crochet rug, and I thought DING DING DING. The cheapo Wal Mart sheets must be mine! I could cut them up and create an awesome rug. So my next trip to the store, I grabbed the last two sheets on the clearance shelf and set off to cut those suckers.
As I was chopping away, I thought it'd be a good idea to show you how I went about cutting the sheet for my rug. So I snapped some photos along the way, and prepared a little how-to for making your own "sheet yarn"!
I will say that with the sheet material I used, it will create a "rag" effect, meaning it's not a super clean-cut yarn. The edges fray and its a little imperfect. Which I'm totally okay with. But if that's not your thing you could have a go at the jersey knit sheets. I actually would like to experiment with those in the future.
Here's how to cut your sheet yarn:
What you'll need:
sheets of choice (I used two cheap twin sheet sets-- you'll need quite a bit of material to make a big project like a rug)
pair of sharp scissors
yard stick or ruler (optional)
Instructions:

First I worked with my flat sheet (not the fitted). I laid it flat, and cut the seam off all the way around the sheet.

Next you'll start on your first strip of your yarn. I cut down the long side of the sheet (this means you'll turn the corner less than on the short side). I made my yarn two inches in width. If I told you that I exactly measured out two inches every time I cut, I'd be lying. I simply just eyeballed it and that worked out for me. But if that's not your cup of tea and you're not lazy like me then you could use your measuring stick and make marks on your sheet with a pen or marker.

Cut all the way down the long side until you reach about an inch from the end, then STOP cutting. This is where you will turn. Think of the design that you'll be cutting as a snake that just slithers back and forth with out stopping (that's actually gross to think about, snakes are sick). Then, going in the opposite direction and two inches from the cut you just finished, you'll cut down to the other side.
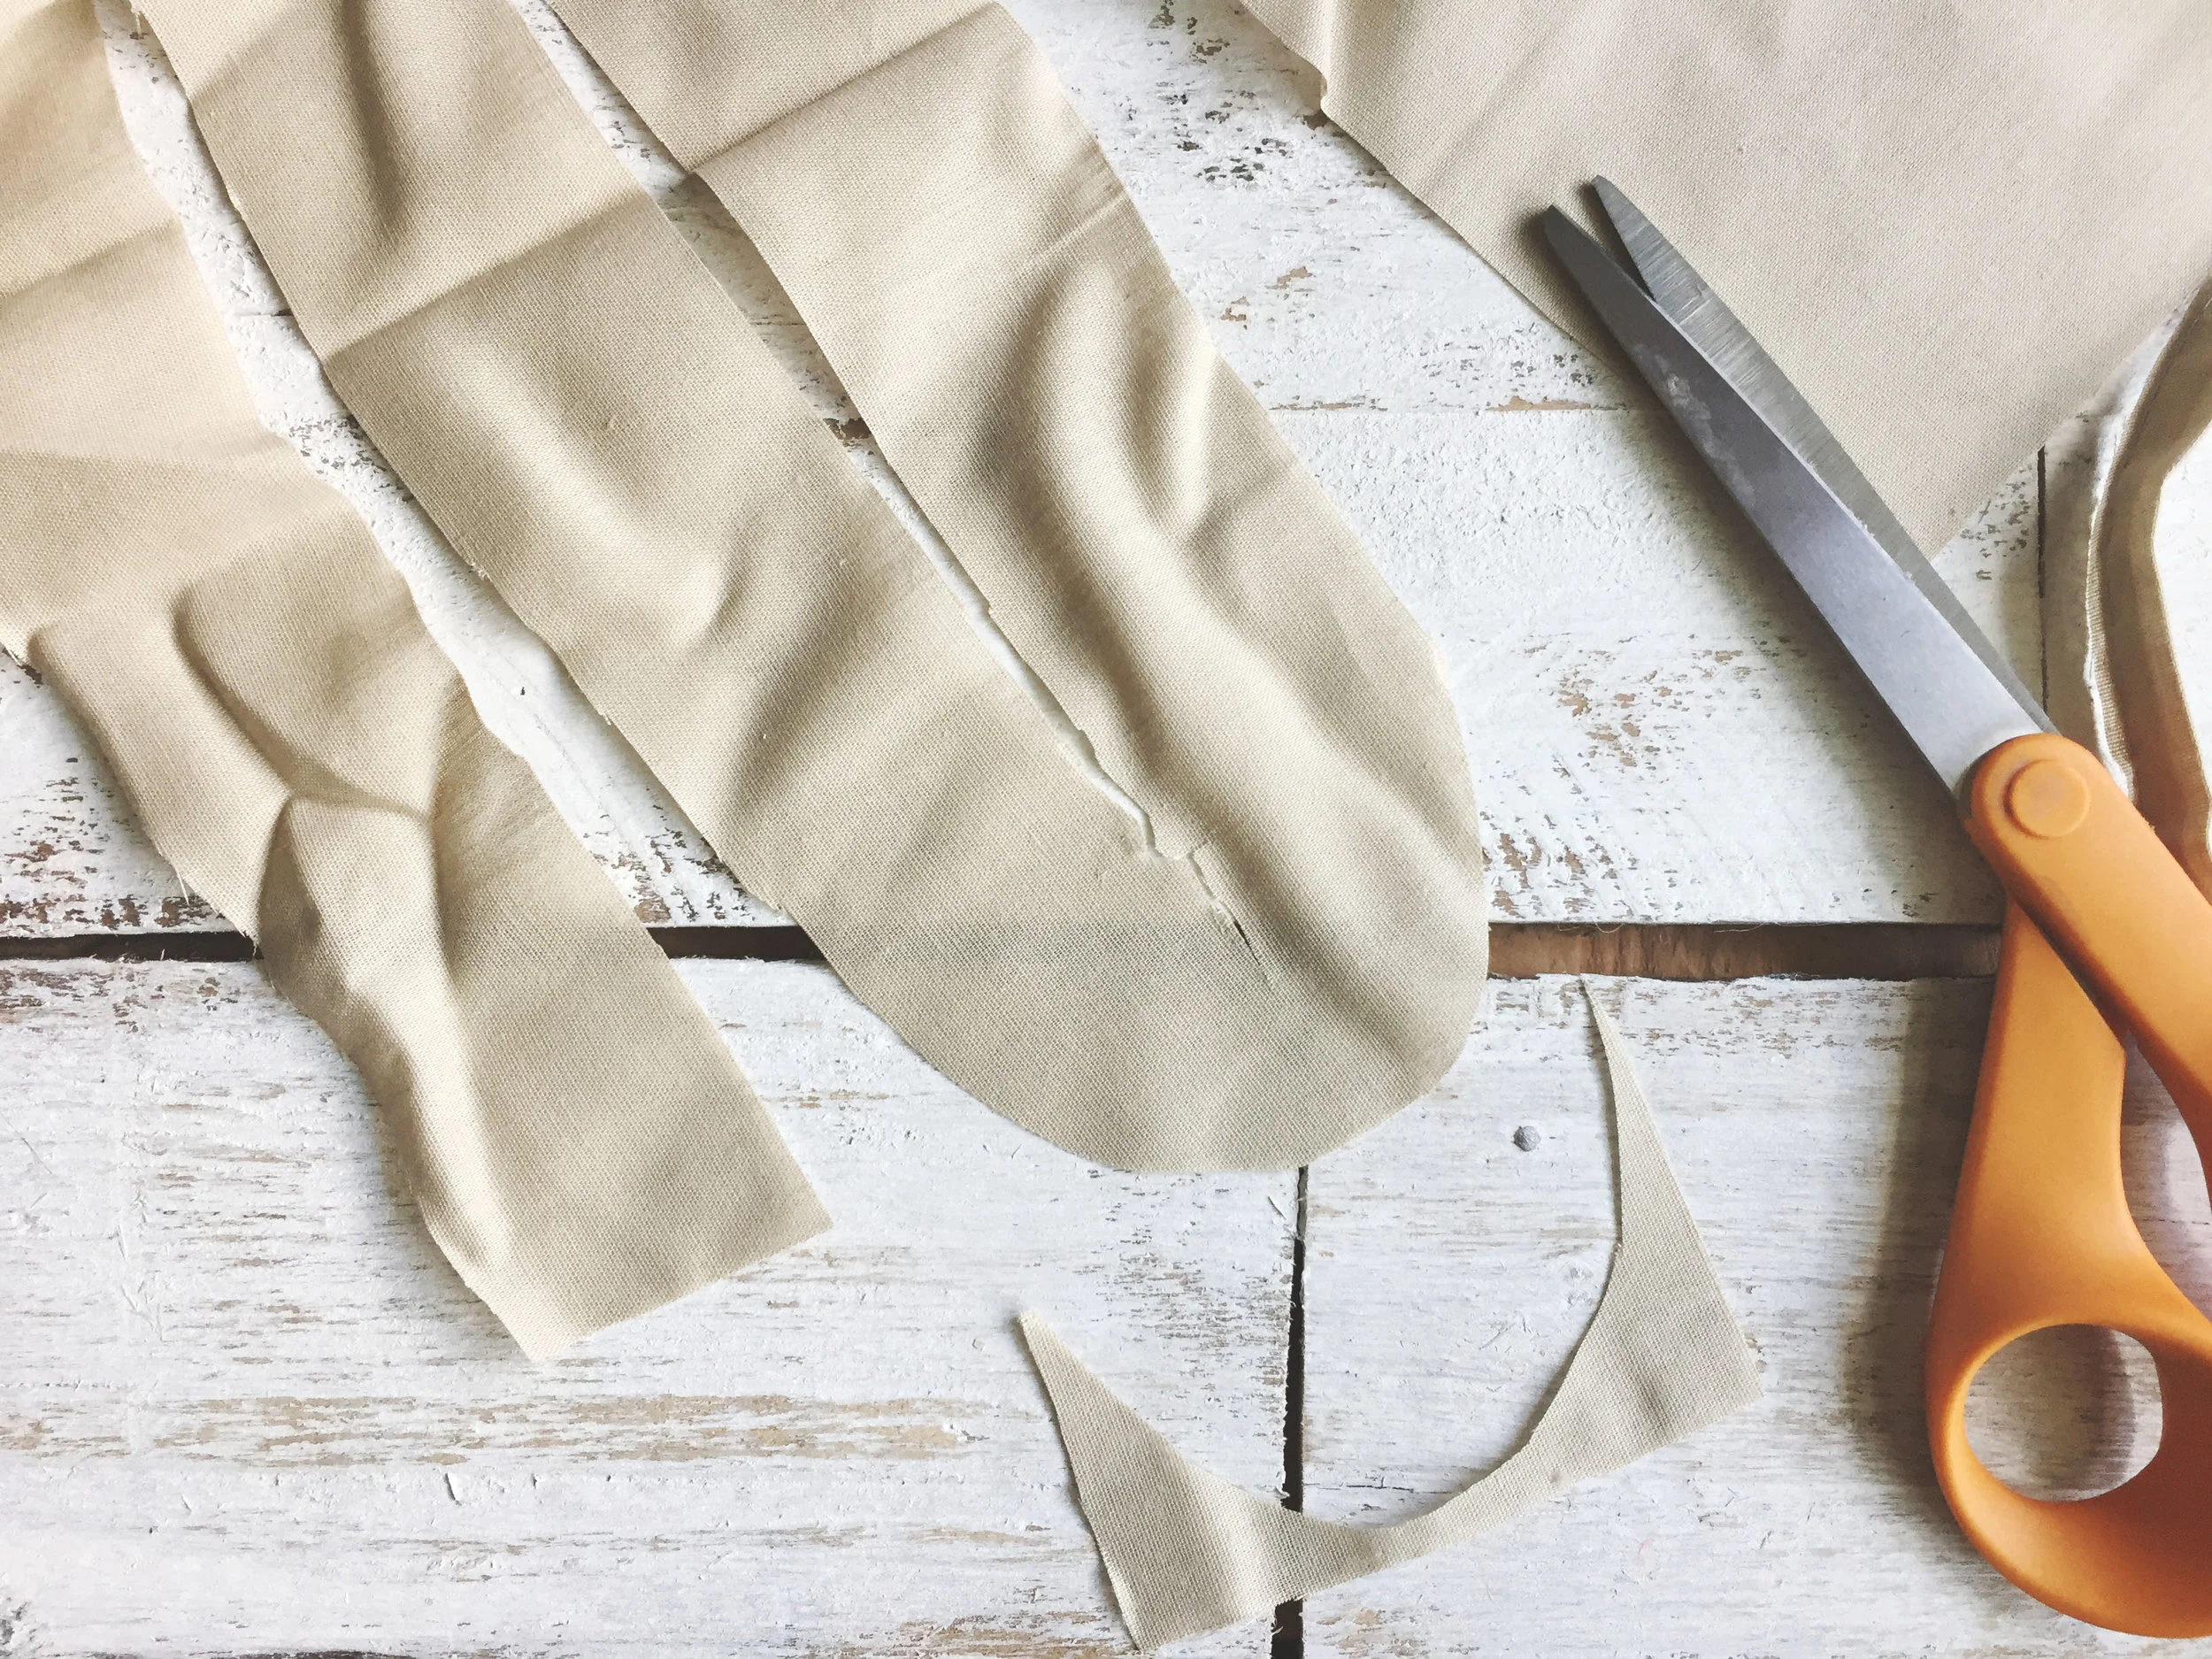
Now, you can do this as you go or wait until you've cut the whole sheet, but you'll need to round off the corners of the ends where you started going in the other direction. This is important because when crocheting the corners will stick out of your project, and its not pretty.

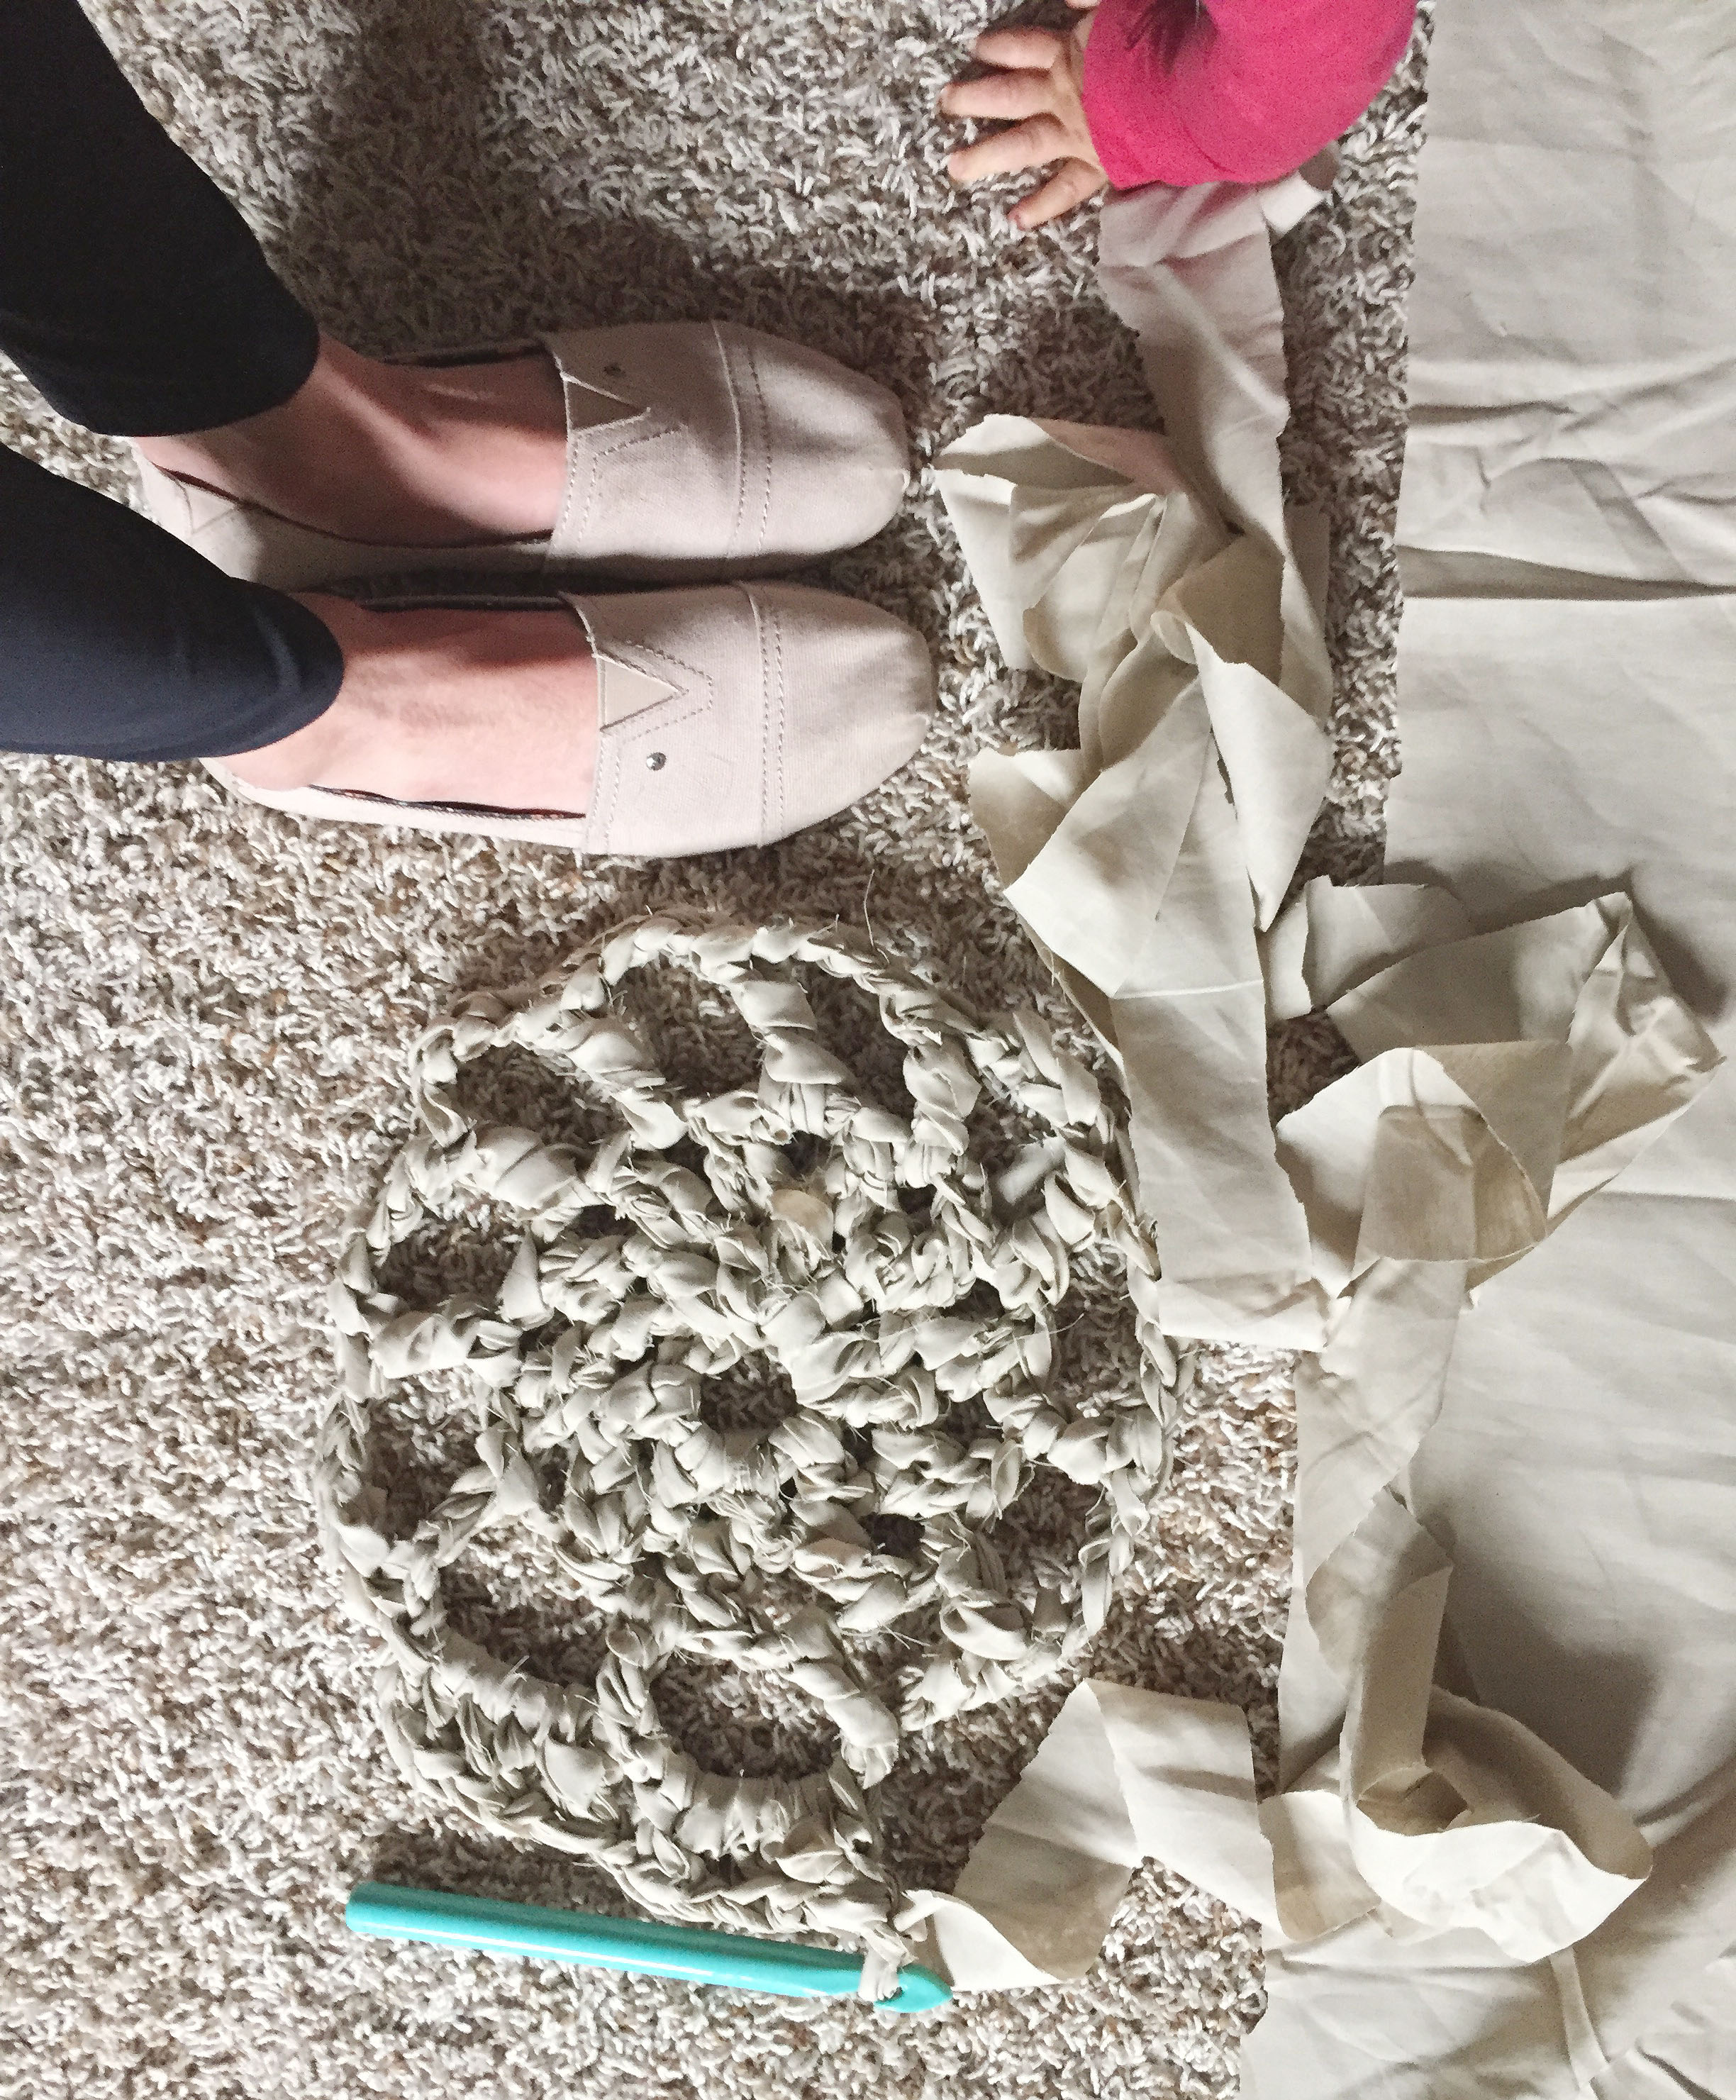
You'll continue cutting back and forth until you reach the other side of the sheet (you can see my work in progress above). I will say that it takes some time to cut all the sheet, but in my opinion it's totally worth it. Think of all the awesome things you can make with sheet yarn, hello?!

After everything is cut, wind your yarn into a giant ball. Then you can marvel at the massive glob of potential!
As far as the fitted sheet goes, all you have to do is cut out the elastic part of the sheet. Mine was all along the shorter side of the sheet, so I just cut along the elastic and around the seam, and then just cut it like the flat sheet. If the elastic is in the corners only you may have to do some additional cutting to make it to where the yarn can be cut continuously.
And there you have it! A super easy and upcycled project. Be sure to keep an eye out for my sheet rug pattern to be released in the near future!
Have a beautiful day, and happy sheet yarn making!!
-Meg


